I put together a list of 10 Non Carving Pumpkin Decorating Ideas because here in the desert our pumpkins don’t last very once you carve them. So instead why not decorate your pumpkins without carving them.
10 Free Kid Friendly Pumpkin Carving Patterns
I put together this list of 10 Free Kid Friendly Pumpkin Carving Patterns. My kids loves carving pumpkins but I wanted something free and easy for them to do.
Homemade Easter Basket Ideas {Under $10}
I challenged myself to make my children’s Easter baskets for less than $10.00 with “useful” items. I did this because I didn’t like the all the garbage included in those cheap baskets you’d find at the store. I wanted items my kids would love, that wouldn’t break the bank. So I headed to the dollar section and the dollar store.
Here’s a look at the final outcome:
The items in the Homemade Toddler Easter Basket are Disney Paint Book, Bible Coloring Book, Bat/Ball, 2 mini Sesame Street Books, Sidewalk Chalk, Crayons, Bubbles, Memory Card Game, Giant Lollipop, Gummy Lifesavers and 3 eggs with candy.
One of my favorite tips: looking for items that had multiple things I could split up. In this case, I chose a 3 pack of bubbles

The items in the Homemade School Aged Easter basket are Glider, Sketch Paper, Disney Paint Book, Crayons, Card Game, Sidewalk Chalk, Bubbles, Crayons, Giant Lollipop, Gummy Lifesavers and 3 eggs filled with candy. I made another basket, just the same so the twins wouldn’t argue.

The Homemade Teen Girl Easter Basket was a beauty basket. Enclosed is a bath pillow, foot massager, hair turby towel, body scrubber, sleep mask, face scrubber, a giant lollipop, gummy lifesavers, and 3 eggs filled with candy.

Rather than wasting money on cellophane wrap, I used clear garbage bags instead to wrap their baskets.
Overall I spent $36.00 for all 4 baskets. I didn’t put that much candy in their baskets because the Easter bunny hides eggs at our house and those are already filled with candy. I’d love to hear the ways you save on Homemade Easter Baskets
Don’t have the time to make your own Homemade Easter Baskets. Check out our post on 25 Already Made Easter Basket Ideas that you can purchase today.
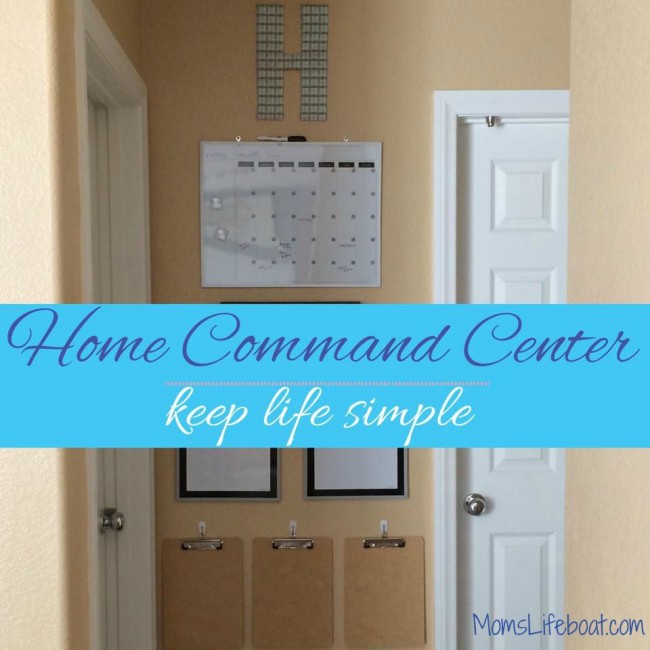
Simple Home Command Center
Lately we’ve been doing some home renovations. I’ve been reducing the clutter in my home as well. One of our biggest issues seemed to be important papers and mail. Our normal routine was to attached important papers to the fridge. Our fridge ended up being our kitchen command center. Then the next thing you know, papers got hidden by other papers and the outside of our fridge was a mess. Something had to be done. I realized I needed a dedicated space to create a proper home command center.
I thought about building one in my office, but in reality, it’d be out of site and out of mind. I knew I wouldn’t use it there. Our family command center needed to be somewhere we constantly accessed. We use our garage door more than our front door, this wall made the perfect spot since its located right by our garage door entry.
Once I decided on the spot I wasn’t sure what I wanted. I looked at several ideas online and got overwhelmed. Some of the ideas I saw were a bit outrageous, held way too much stuff and the last thing I wanted was more clutter.
Before I got started, I took a moment and looked at everything we had on our fridge. We had a calendar, dry erase board, menu planner, to do list and a magnet to hold all of our important papers. Once I realized what was a necessity I created a simple home command center.
The H. Very simple to make and it added a cute touch to our wall organization. I grabbed a piece of cardboard and cute the shape of the H. I used some remnant fabric cut it to fit and taped it in the back. Then I stapled it to the wall.
I got a practical dry erase calendar. Easy to update and make changes too.
A mailbox indoors. Perfect for all those papers you don’t need right now. (plus it’s a great place to store the dry erase markers)
I purchased 2 square dry erase boards. I love how I can use these for multiple things. My menu for the week. My to do list. I can add motivational messages, etc. It really gives me the option to change it up.
Clip boards one for each kid. Each time the kids bring home papers I need to sign, they attach it to the clip board. If I have homework I need to check or updates on their school spirit days or sports schedule this is where they place it. That way, I don’t forget.
That’s it. Pretty simple, Eh? If you are considering making a simple home command center, be sure to pin this to your pinterest board and save it for later.
Repurpose Bunk Bed – Creating Different Projects
Earlier I shared with you the twin headboards that I found for my boys bedroom. I would have painted their existing beds, but their beds were originally bunk beds. One of the side panels of the bunk bed broke and therefore I only had one of bunks in working condition.

One of our friends had the same issue and we sanded down on of the side rails and gave it to them, so they could fix theirs. Unfortunaley I don’t have a picture for that.
I used the slats and created this sign. The slats were special to me, because the kids and other guests wrote notes on them. I wanted to preserve that in some way.

Since I had no use for the other bed, I decided to give it away to one of the girls in my MOPs group.
She patched the holes that would have held the top bunk.

and used a dark navy chalk pain and the transformation was amazing!


So next time, wait before you toss out your furniture. Think of ways to repurpose it into different projects.
How to Renovate a Bedroom with New Flooring on a Budget
Renovating a Bedroom can be costly. However living on one income we don’t have that luxury to spend a lot. We have to do the work ourselves and spend our money wisely. We recently renovated one of our bedrooms. We also added new flooring and did this all on a small budget.

To give you a bit of a back story. We live in a 3 bedroom home with a Den. Our Den has gone through several transformations. It started out as guest bedroom/office and then we converted it to a main office/study. Over the past few years, we’ve used the office mainly as a storage center for statements, books, supplies etc.. But rarely did we really sit and enjoy the office space.
So after much debate with my husband, he convinced me that we needed to put that room back into a guest bedroom. I argued that the guest bedroom will barely get used, but over the past year, we’ve had a few guests drop in unexpectedly. Having that room ready for those occasions will definitely come in handy. Once I found another area of our home to set up my office, I surrendered and went full force on tackling this project.
The first thing we did was rip the carpet out. It wasn’t an option to keep it. We really needed to replace it. We contemplated getting carpet again but decided laminate flooring would better suit us. Then, I painted the walls a color called Silvermist by Sherwin-Williams. We were covering up a deep dark red and I didn’t want to waste time or money. So I splurged and bought the Sherwin-Williams Infinity paint from Lowes. One coat coverage and it covered beautifully.
Then my husband installed the Hampton Bay Hand Scraped Walnut Plateau 8 mm laminate flooring from Home Depot. We’ve used this laminate flooring throughout our first floor and let me tell you… I love it! Before we bought it, I soaked the sample in water, scratched it up, just to see how durable this flooring was and to my amazement, it held up great. We had the flooring for over a year installed and couldn’t be happier.

The flooring is inexpensive too. For $1.10 a square foot you really can’t beat that. Next we installed the base moulding. I know, we could have saved some money by reusing our existing moulding but since we already replaced it throughout our first floor, we felt it was necessary to do the same with this room.
To do all of that, our expenses totaled $282.74
As for the furniture in the room. I was blessed to decorate the room with what we had on hand and items donated by friends who were moving.
I did want to style it up so I added bonuses to the room. I call these added bonuses because these items were all wants.
Bedding:

Curtains:

To recap and get this look… I’ve listed all of the items I used below. Some of the links below are affiliate links. When you purchase your products through our links, it’s your way of helping support Momslifeboat at no cost to you. Thank you in advance for your support!
Room Renovation Products:
$141.68 – 7 boxes Covered 120 sq ft with plenty to spare.
$54.98 –
$39.10 ($0.85 LF)
$46.98 – Silvermist
Total Room Makeover $282.74
Added Bonuses
$29.99 Henny Rand Curtains from IKEA
$5.99 curtain rod
$4.47 Wall bracket (3 @1.49 each)
$1.99 Finials
$49.82
Total $92.26
Total Invested $375.00
A total room makeover for $375.00! I hope you enjoyed this article and stay tuned… I can’t wait to show you my new office renovation.
Tween Boys Bedroom – Budget Friendly – DIY Transformation
Last summer when my oldest moved out of the house. The twins got to move into her bedroom. We painted all of their furniture and the only thing lacking was their headboards. I found some awesome pieces at the thrift store. 2 headboards for $20.00
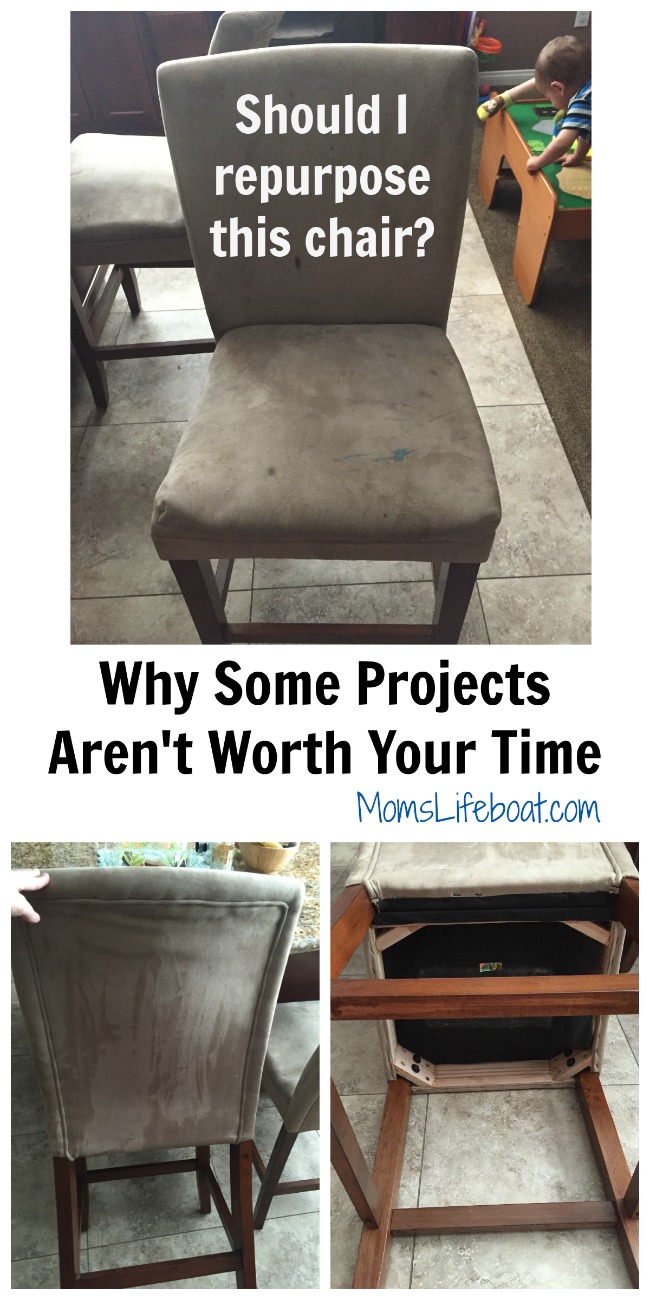
Why Some Projects Aren’t Worth Your Time!
Sometimes as much as I love something or want to save money and repurpose an item. There comes a time when I say to myself. Don’t waste your time! Just get rid of it!
I recently helped a friend reupholster her coffee table. That project was amazing and totally worth it.
But then she asked me if I could help her reupholster a chair. My mind instantly went to NO!
Embarrassed By Your Furniture? Here’s What to Do!
Recently a friend of mine was getting ready for her in-laws to arrive. While she was tidying up her house everything looked good but her focus went straight to her furniture. She was embarrassed by her furniture! She didn’t want her in-laws to see her torn up furniture.

My friend called a few places looking for someone to recover this table. But hearing the prices and lack of follow through from these companies was nerve racking and she contacted me for help.
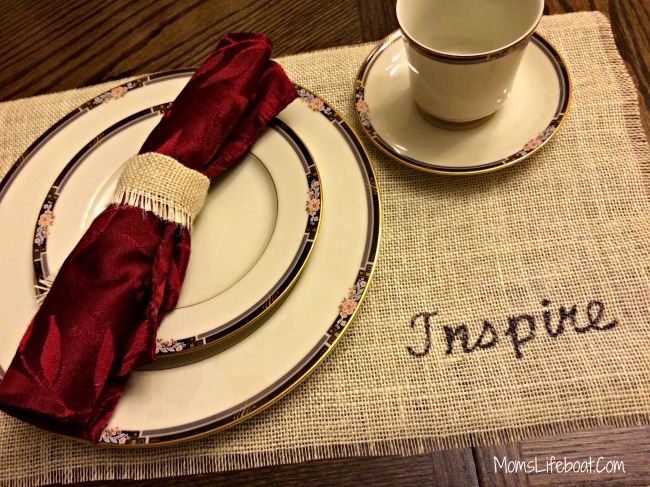
No Sew Placemats Using Burlap Material
I jut got finished repurposing my dining room set. Now that’s all done, I wanted to make some cute no sew placemats. Our dining room set now has a shabby chic look. I wanted to add some table decor and the first thing that came to mind was burlap material.


